Showing posts with label Hair Tips. Show all posts

Tuesday, April 23, 2013

My Top 5 Hair Tips

Hair is a reflection of your health & personality. If taken care of they can add to your beauty. Your hair and scalp need proper care now and always. When it comes to your hair there are so many things out there on hair tips and tricks. As a licenced Cosmetologist these are some of my favorite hair tips I want to share with you today.


1) Your hair has memory and it is so important to change up your normal routine to get the full benefits out of a hair care product. What I mean by this is, if you use the same shampoo and conditioner for years your hair isn't going to get the benefits it could be. Your hair will just get used to the same properties in a product. My rule of thumb is to have about 3 or 4 different shampoos and conditioners and alternate them every 2 weeks or so. This also helps your product last a lot longer. Use one of your favorites for moisture, one for damage, one for color treated etc. I have 4  different shampoos and conditioners in my shower that I alternate. When I do this my hair is a lot  healthier and, I can tell a big difference. Try to use professional products as much as you can yes, they can be pricey but the technology in them is worth the money spent and the results are amazing.
 
 
(I switch them up a lot but these are what I use right now)


2) Use a deep conditioner every week.  Any that you buy, professional or not it will normally say to leave on for 3-5 mins. That is not nearly enough time to allow for you to get the full benefits. Here is what I do: Make sure you have 35 mins of free time. Wash your hair, put on the deep conditioner or mask (same thing) and let it sit on your hair for 30 mins and put a shower cap on to allow it to soak in. The last five minutes put your blow dryer on to allow the cuticle of your hair shaft to open with the heat and let the conditioner soak down to every layer of your hair shaft. Let cool for 5 mins before you rinse it all out. Dry your hair and you will feel a HUGE difference in your hair. After you do this for a month straight, cut back to only once a month maintenance. Salons have professional grade deep conditioners that work awesome and that you can't buy over the counter. One of my favorites is, Redken Chemistry Shots, just make sure they leave it on long enough to get the full benefits.
3) Dry your hair with your head upside down to get some natural volume. Once a week let your hair air dry without heat. Use a blow dryer with NanoIonic Complex (a blend of 32 natural-occurring minerals) that emits Natural Negative Ions in to the hair. Natural Negative Ion energy is powerful enough to break down clusters of water molecules into fine particles that penetrate the hair shaft, to re-hydrate, re-condition and restore moisture balance. After using the Bio Ionic product system, hair feels smooth, super-soft and looks silky-shiny. My favorite is the BaByliss Pro Nano Titanium blow dryer and I love their straightener as well. Again it is more pricey than a Walmart or Target brand blow dryer but in the long run it will save you money because you will not have to replace this every year. These have a 4 year warranty and they are worth every penny in my book. Your hair will love you for using higher end hair tools. :-)

4) Use PRODUCTS in your hair before you dry it and after you dry it. There is a lot of hair care products out there so how do you know which ones are right for your hair? Well, trail and error there isn't just ONE product that will work for everyone. Every ones hair is different and has different needs BUT the nice thing about hair products is they really have a lot of technology behind them and  they are meant to do what they say they will do.  Find ones that work best for your hair in these categories. Everyone need a  blow dry protectant spray. Heat is harmful to your hair that is why we have products specifically for the heat elements of a blow dryer, straighteners and, curling irons. My favorite is Kenra Blow dry spray ( use on wet hair). Next you should be using a root lifting spray. Hands down my favorite is Redken Guts (use on wet hair), this is a product that everyone can use whether you have thick or fine hair it is AMAZING! Then you should be using heat protectants for straightening or curling your hair. The heat elements are different then the blow dryer. Some of my favorites for straightening is, Redken iron silk or Kenra thermal styling spray ( use on dry hair). Use these sparingly you don't want your hair to sizzle AT ALL when you use these otherwise you are using too much.  You should use a frizz or shine gloss to tame down fly aways and prevent split ends. Just don't use any that have alcohol in them, it will dry your hair out. Next you should be using a good hair spray to set your style, Kenra 25 is the best hands down. CLICK HERE  Avoid products that leave build-up on your hair. If you see white gunk, that means that your product is not water-soluble and may be coating your hair shaft. Build-up causes limpness, breakage and inability to curl not to mention the white flakes.


5) Get your hair trimmed on a regular basis (approximately every two months). This is especially important for growing out layers and/or bangs to reshape and make each stage of growing hair out a style. You need to have a nice clean edge to prevent any split ends. Most importantly have the right cut for your bone structure and face shape CLICK HERE and CLICK HERE

Monday, January 21, 2013

How often should you shampoo your hair?

You may be washing your hair more often than you need to. Shampooing three times a week is plenty. You have natural oils on your scalp that need to do "their thing." Daily shampooing is only necessary if oil production on the scalp is high. A clean head of hair feels fresh and smells great but over-washing can turn one's healthy locks into a pile of straw. How often you need to shampoo depends on how oily your scalp is and your hair's texture. Oil-known as sebum-travels more easily down smooth, straight hair, making it look greasier faster. Sounds a little gross, but sebum helps moisturize and waterproof the hair shaft. This is one reason why curly or coarse hair is drier. When you wash every day, you typically strip off this natural moisturizer and then have to slather it back on in the form of commercial conditioner. If you are used to washing your hair daily, it can take a few weeks to get used to a new routine.  Gradually increase the days between shampooing and see if your hair becomes healthier and takes more time to appear dirty as a result.  Ultimately, how often you shampoo is a matter of personal preference.  Give it a try :)

Friday, October 19, 2012

How To Cut Boys Hair The Professional way

As promised once I hit 50 followers (YAY, thank you so much) I am going to give you a step by step on how to cut boys hair the professional way (not just a clipper cut). I have been a Cosmetologist for 11 years now and I LOVE doing hair! Really what it comes down to is practice makes perfect. What better way to practice on boys hair because if you mess up it doesn't matter you can just buzz it and that's OK (boys don't mind) It can be very intimidating when you first cut hair. (I remember how scared I was about not messing up) But I promise you can master this skill. Boys need their haircuts anywhere from 2-5 weeks so this will save you so much money in the end to be able to master this skill. I am going to show you how to cut a cute faux hawk and just a basic traditional haircut you can do for any boy =) My boys will be my models.

What you need:
  • Good clippers (Wahl is a good starter one that you can get at Sally's Beauty for about $50.00) this is the kind I will be using. If you want an investment then 76'ers is the way to go :)
  • A comb, ( I like to use a white comb if they have dark hair or a black comb if the have blonde hair) this way you can see the hair really well
  • Trimmer for around the ears and neck line (you can get these at Sally's Beauty too) please don't EVER use just the clippers for your edging around the ears and neck, you can cut them soooo easy that way, just invest in a good trimmer and it will make your life much easier in the cutting field :)
  • Cape or towel to keep hair off of them (or just a good old garbage bag cut a hole for the head)
  • Spray Bottle
  • Polmade, gel, Hairspray
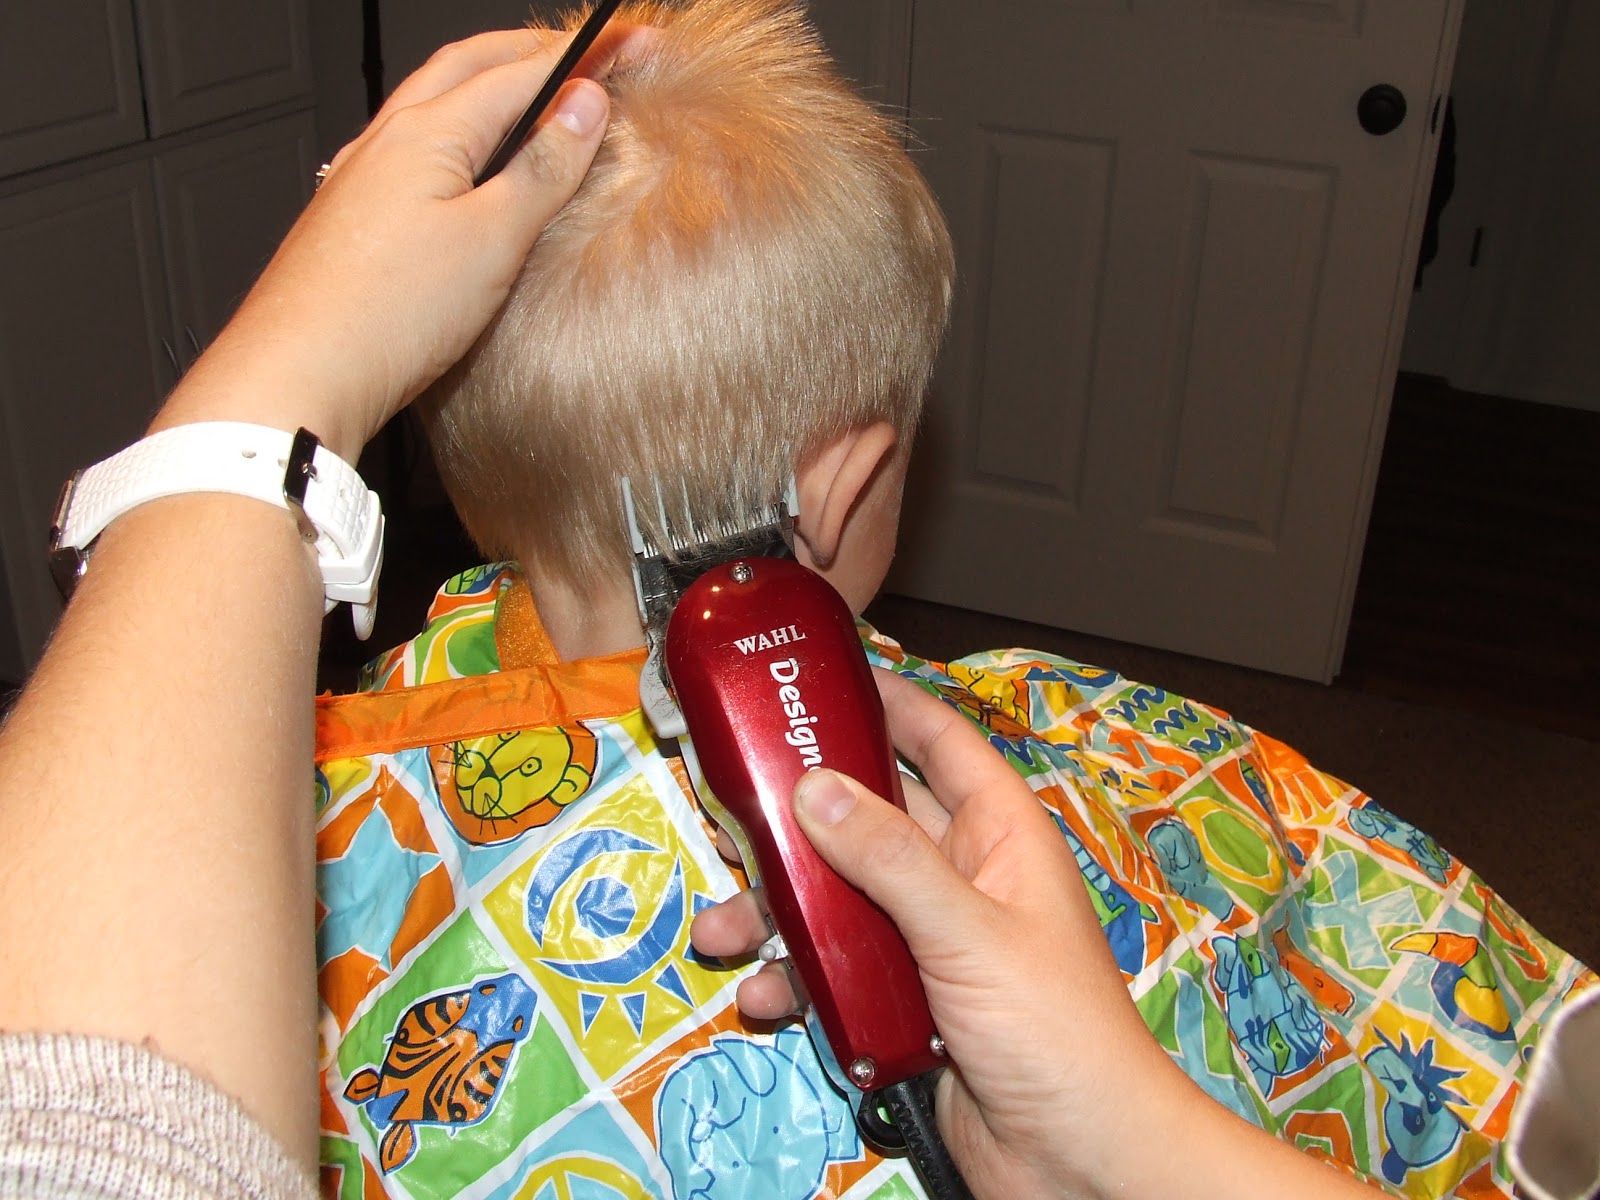
First my favorite clipper size on boys is a 2 or 1/4 of an inch.  Keep head in an upright position and start from the bottom of the hair line and work with a "light moving wrist" in a C shape towards you up to about the middle of the back of the head (just below where the head starts to curve and turn from the top of the head. Make sure the clippers are against the head at all times until you bring your wrist out towards you in the C motion. Do this all around both sides as well (I like to take it up just too the temples or just barely above the temples. Make sure you ALWAYS only use your clippers on dry hair to get the best even cut.


  • Next I like to trim all around the ears and neck line. My favorite neck lines are the nice clean square but everyone has a different hair line so you will have to go with the hairline for best results. Move the ear to edge around it so you don't cut it, you can either pull it towards the back or bend it out of the way

 pulling it back OR
Bend it forward out of the way
 Square it all up in the back

  • Next wet the top of the head cut the desired length you want starting in the middle and working outwards to each side.
 Spray it all to get wet
Get the length going side to side first and meet all the points together
then go down the middle to connect everything

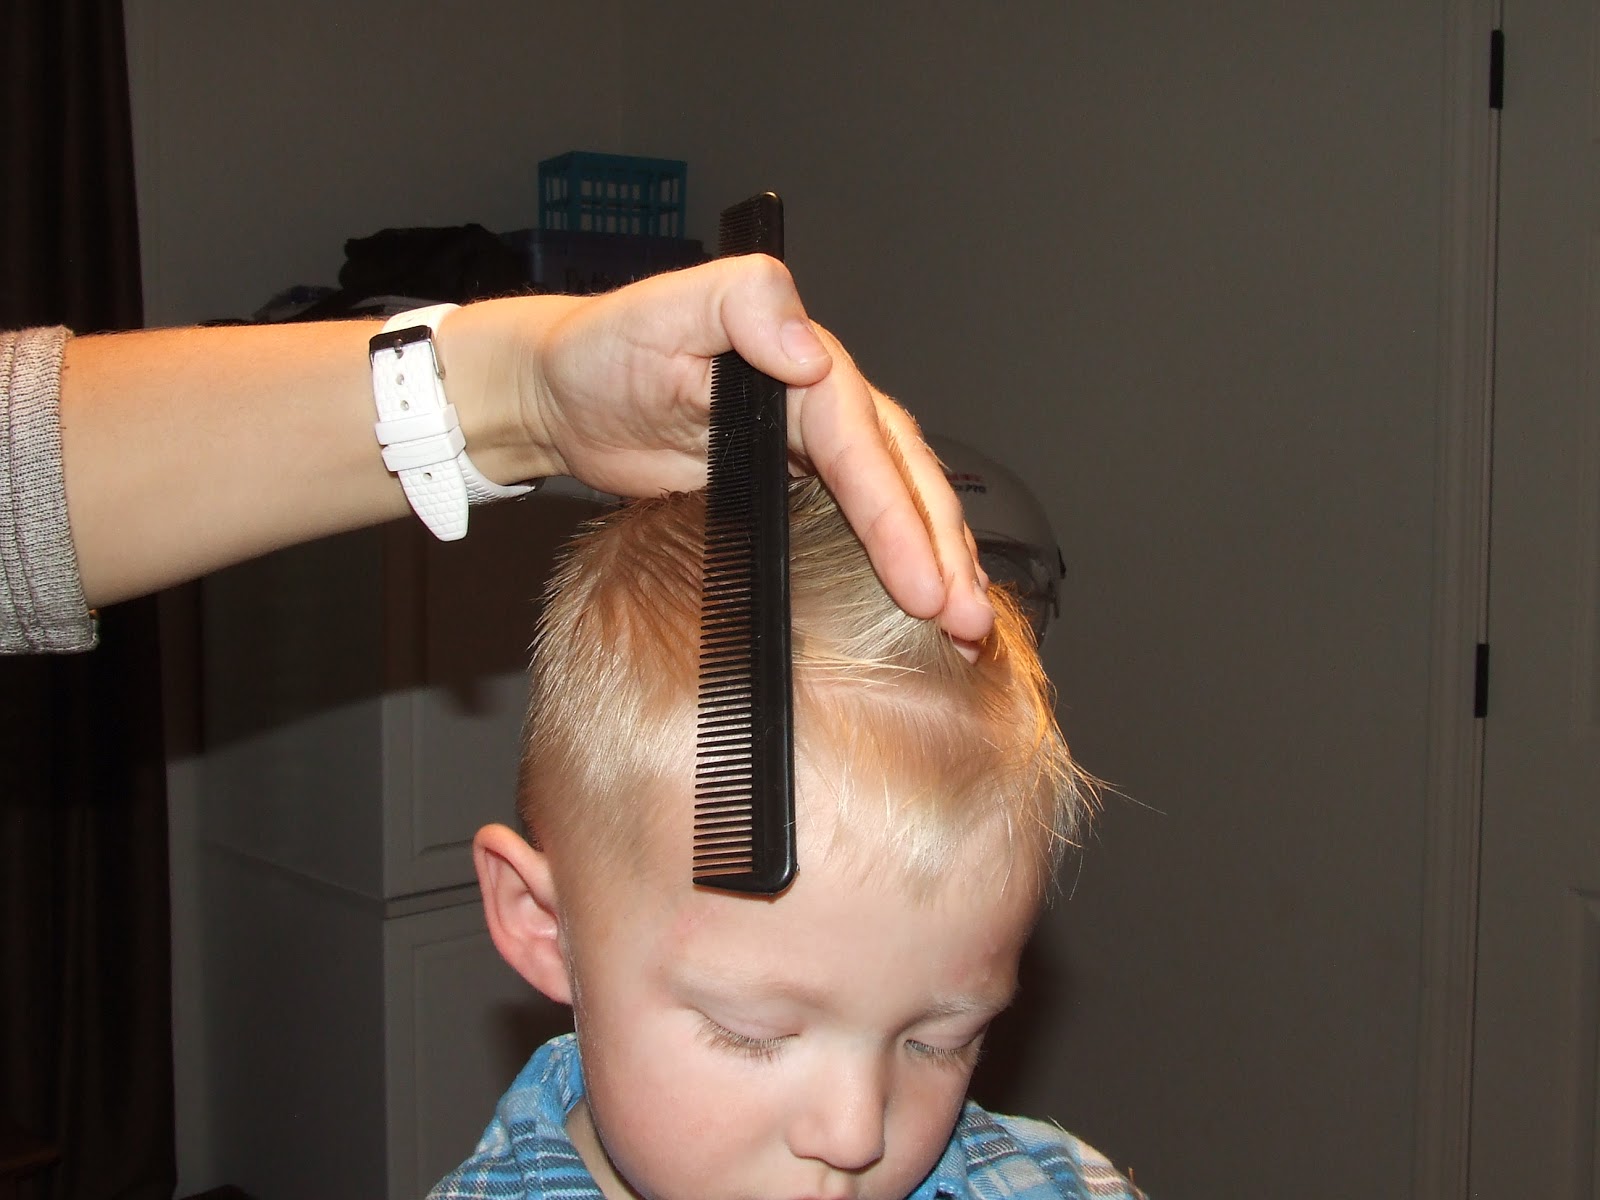
  • After you get the top length how you want it you need to blend from the top to the sides. Go around on the sides and hold your hand at a 90 degree angle and you will see the point where you need to cut off to blend from the clipper part to the scissor part (I hope that makes sense) I like to free hand it with my comb but I will show you both ways until you are comfortable free handing the blending :)

 This is a free hand with a comb you hold the comb at an angel and connect the points
 You can do the same thing with your fingers, use this way until you are comfortable :-)
Nice clean cut

Doing this you will have a nice blend from the length to the sides without a line

Now for the other one. ALMOST all the same steps as above. This will be a Faux Hawk :-)
 Use the clippers and work from bottom to top all around the sides and back


get the length you want to cut off the top from the middle first go in a "Mohawk way" down the middle
 Cut it and move from back to front and connect it all to the same length

 Now once you did the "Mohawk" (down the middle) you need to bring the hair all up horizontal and connect the outer side to the middle where the length is.
Just connect where there is a high point

Now comb the sides all down.....
it will look messy and not blended yet
take from the top length to the sides at a 90 degree angle and connect the point you will see

or again you can free hand it with the comb

now it is all blended from the top to the sides, do that all around :)


TA DA all done, remember practice makes perfect :-) For those of you stopping by for the first time PLEASE, follow my blog as a favor in return for this tutorial, it would be greatly appreciated and if you already are a follower, THANK YOU!!! To be a follower just go on the right hand side of my blog and where it says "Awesome followers" and click join :-)

Monday, September 24, 2012

How to back comb your hair the right way!!

A lot of my hair clients say they always have a hard time back combing their hair like I do it and make it stay. So I thought this would be a great blog post because I am sure many people would like to know how to back comb, the right and professional way to make it last ALL day!? Today I will show you step by step on how to do it right. I wish I could upload a video then I wouldn't have to type so much instructions. One of these days I will get it to work!!

Step one here is what you need to use to get the best results and the support to make it last ALL day.

When your hair is wet spray Redken Guts on the sides and back of the top of your head. I do two sections on each side and back because that is where you will be placing your back combing and it will be the support for all the back combing.

Blow dry your hair head down for the most volume


after its all dry, you can see around the top I already have some volume but just wait....=)


Take a section about an inch thick on the top/back of head. Have good tension on the section and back comb with a fine toothed comb about 2 inches up the section.
Every section that you back comb spray some Kenra 25 hairspray at the root underneath

Next do it on the side
(not front side yet, just under and to the side of the back to give you a nice shape and support)

 Back comb
 Spray
You want to have a nice roundness to the shape and not a big drop off if that makes sense

Then do two sections on each side toward the front...yes it looks messy but TRUST ME!!

OK all done go out like this....j/k BUT, let me tell you if your hair isn't this crazy before the next step, girl you don't have enough back combing tension going on. It needs to be this big to have the support to last all day!!

Now here is where the magic happens. I call this my grandma comb because my grandma always had a comb like this growing up. This will be your BEST FRIEND when it comes to back combing.
 Start at the back on top and smooth over with the "Magic comb"
You will feel like you are combing out all the back combing but you are not. You have the support of the guts, hair spray and back combing all in one =)

This is to show you that you want a nice smooth bend from top to bottom so it isn't all messy looking

Work on the other side to smooth it

Make sure you go all the way down to the ends of your hair so it is super smooth

Top view
TA DA!!! This technique is for short or long hair. I promise if you use these products and my steps you will have back combing last all day long. =)
Please follow my blog, I love new followers, thanks :)


Related Posts Plugin for WordPress, Blogger...